The twenty-first century has unquestionably emerged as a watershed moment in the history of video games. Following the year 2000, there were some significant changes in the way games were played as well as perceived.
Over the last two decades, there have been significant changes in in-game features such as gameplay, media in the game, characters, and so on. Modern games are more about the immersive experience, simulations, and making the player the creator of or within the game.
With the introduction of numerous new games and platforms, this immersiveness and creation have reached new heights.
When it comes to the aforementioned features of a modern gaming experience, Roblox is unquestionably one of the best platforms. It is correct.
It is no longer enough to simply play the game; it is also necessary to create it, and Roblox has provided the platform for even those who have had no training in game development to come out and demonstrate their creativity.
Table of contents
What is Roblox?
Roblox is a gaming platform that also serves as a platform for game creation. It is extremely popular among those interested in game development and computer programming, particularly among younger children.
Roblox Studio allows you to create games, and you can also directly publish your game on the platform for others to play.
In this blog, we will discuss one of the most important aspects of games and game development: NPC which stands for Non-Player Character.
How To Animate NPC Roblox
Everyone who is familiar with gaming understands the significance of NPCs, they make a game more interesting in various ways. We’ve established that Roblox allows you to create games, but does this also imply that you can create NPCs?
Certainly! In Roblox, you can absolutely create NPCs to give your game an authentic feel, making it interesting and appealing to anyone who plays it.
I’ve outlined the steps for animating NPCs in Roblox below for you to follow:
Step 1: Open Roblox Studio.
Step 2: Choose a template.
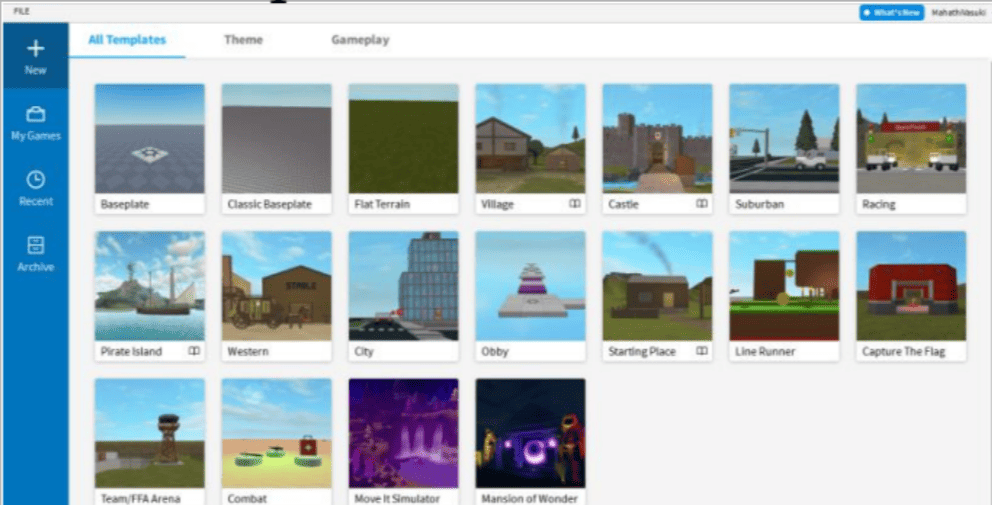
Step 3: Click on the PLUGINS Menu.
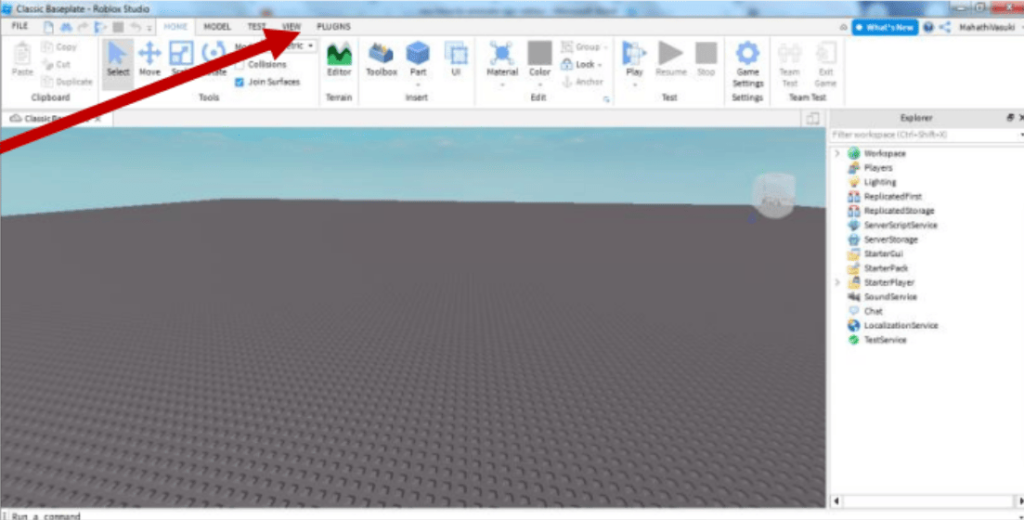
Step 4: Click on Build Rig-Rig Builder.
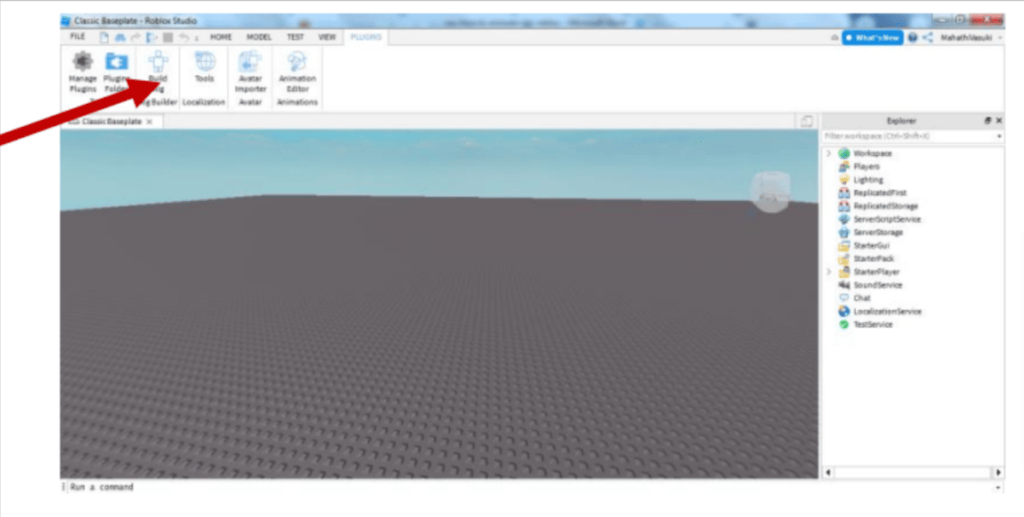
A Window as shown in the image will pop up
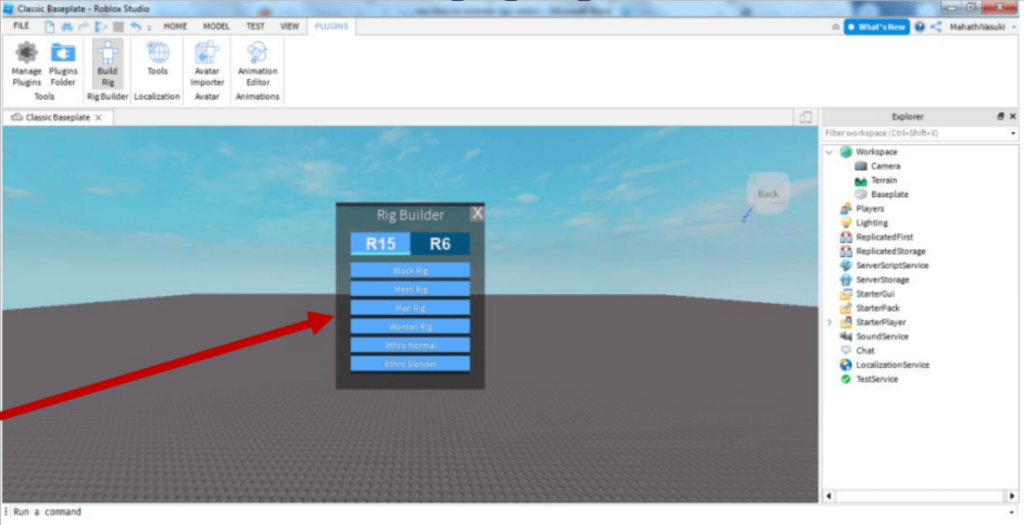
It has two options: R15 and R6.
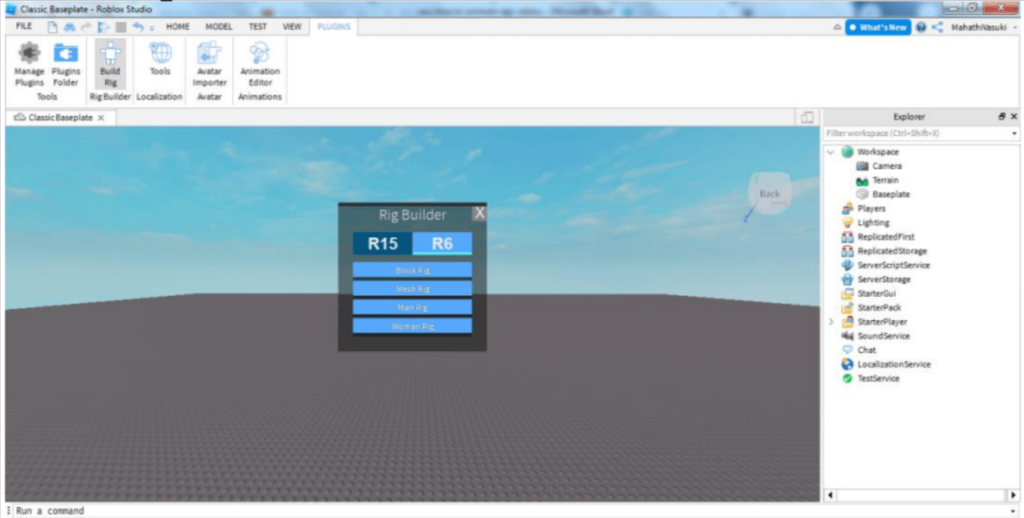
- R6 has rigs with 6 movable body parts.
- R15 has rigs with 15 movable body parts.
- R6 category has four options to choose from

- R15 category has six options to choose from

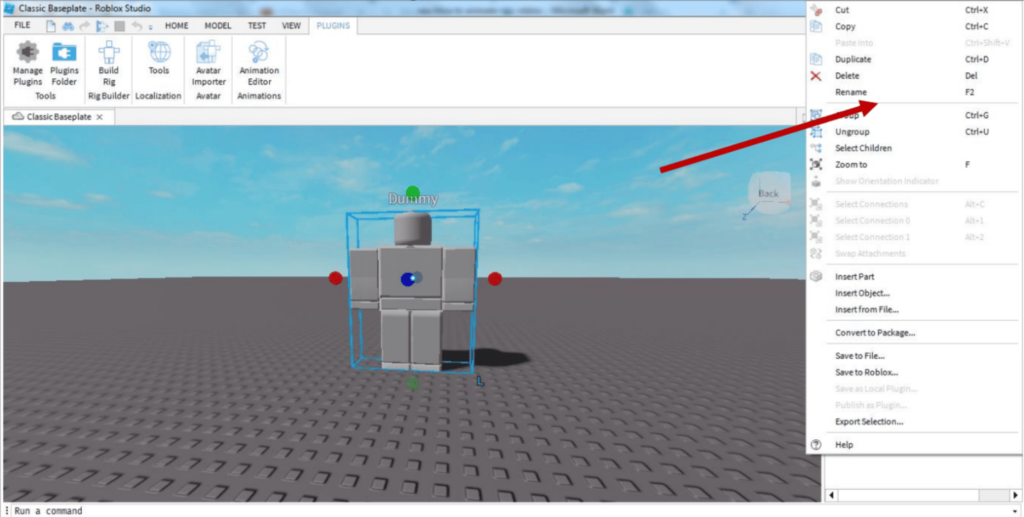
Step 5: Pick any Rig of your choice. Any Rig you select is given the name ‘Dummy’ by default.
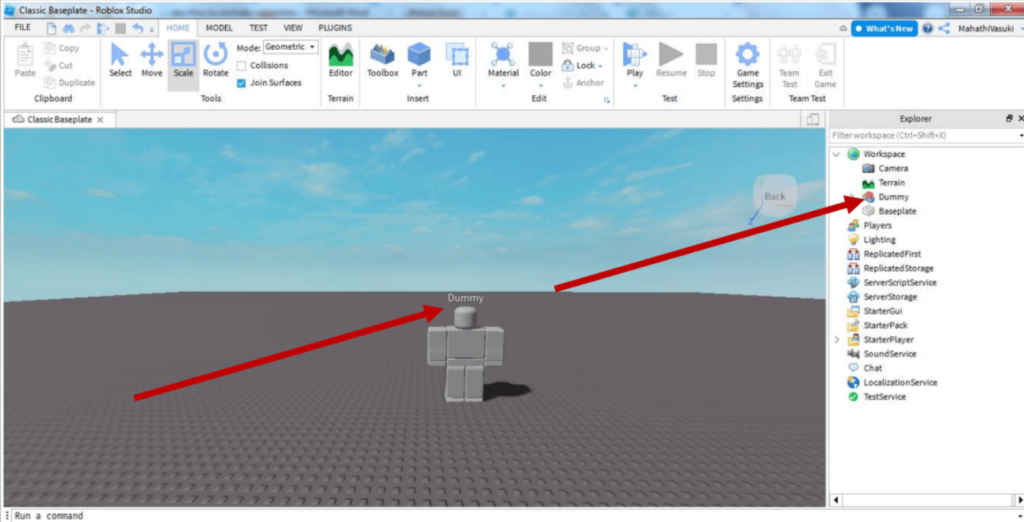
You can also rename it if you desire to.
Step 6: Click on Animation Editor
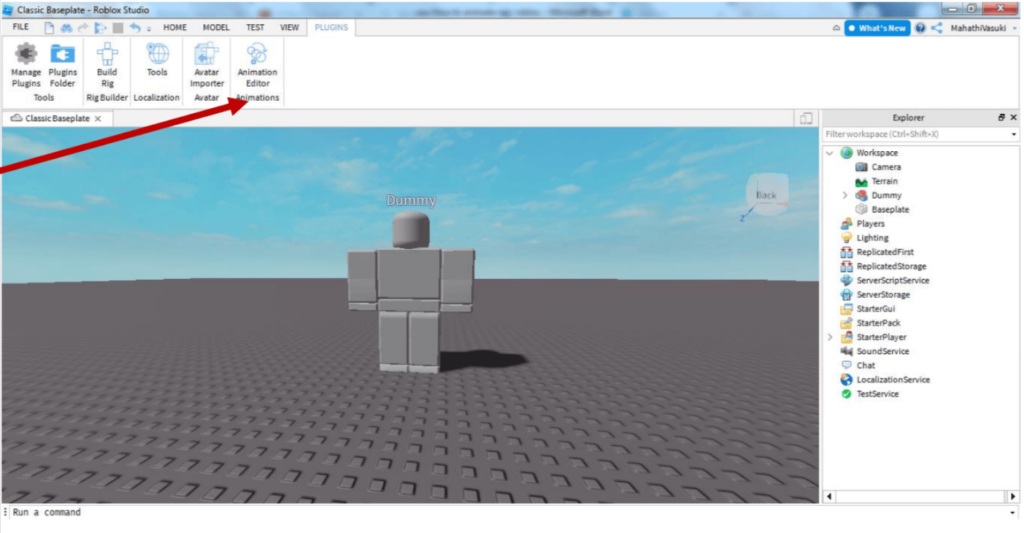
Step 7: Select the rig or click on the rig that you want to animate
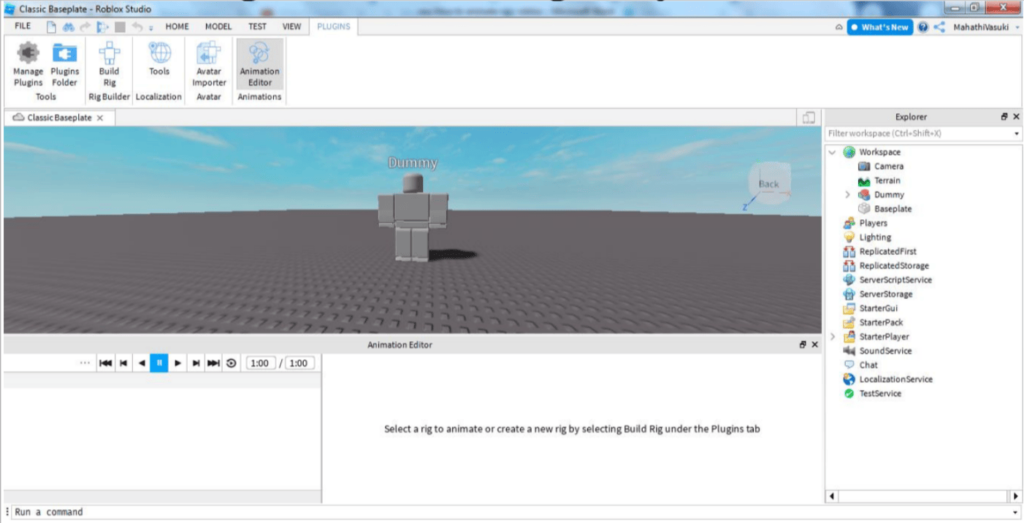
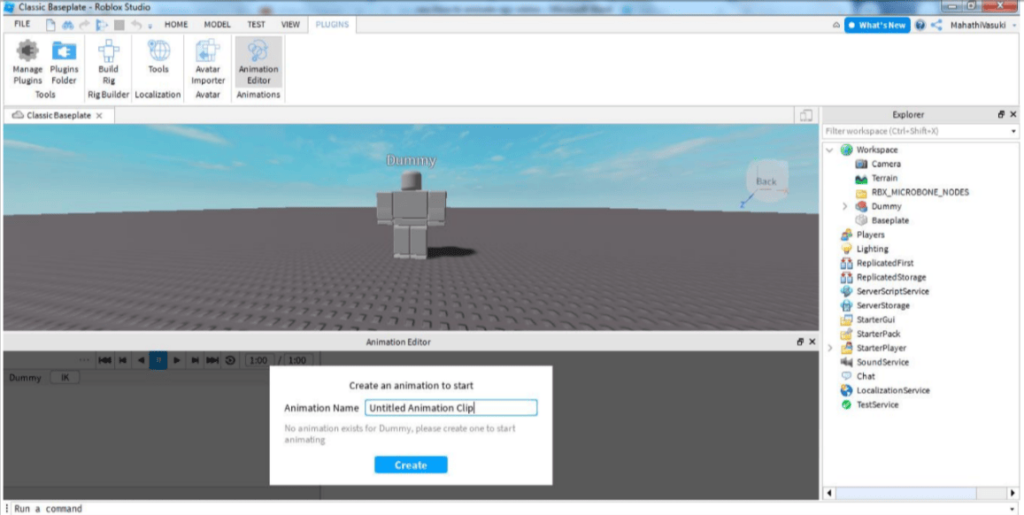
Step 8: Give a name for this particular animation and click on Create.
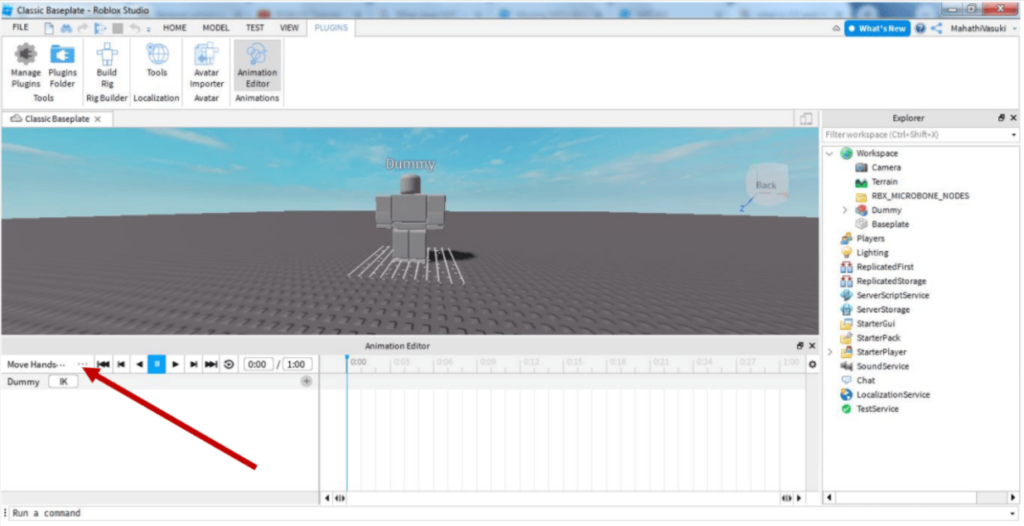
The animation’s name will appear on the left side of the animation editor window below.
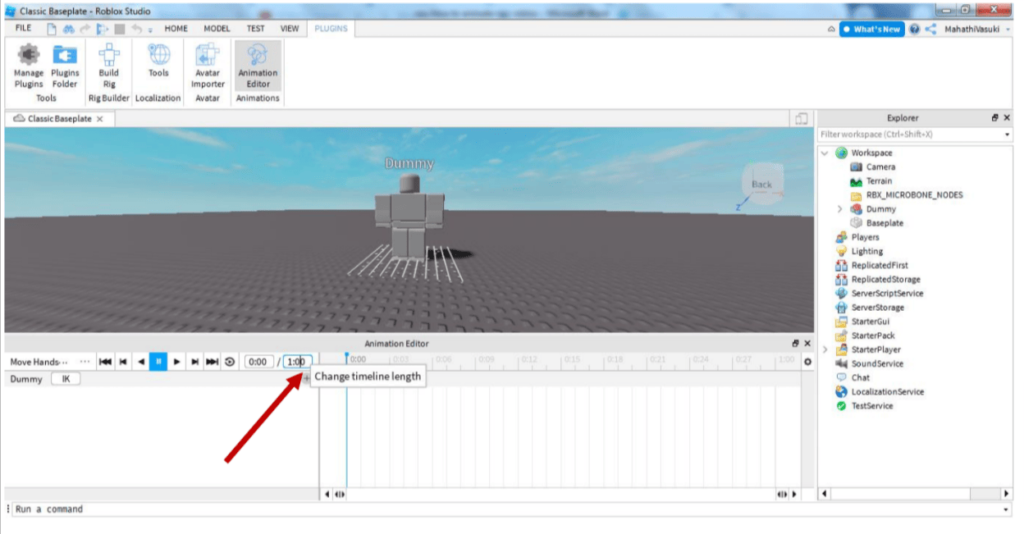
Step 9: You can change the length of time or duration of the animation.
Step 10: Click on the timeline, then on the part you want to animate. The three colored rings then appear, allowing you to rotate the parts around whichever axis you want. Continue this process as you move forward on the timeline.
Step 11: Once you’ve completed the timeline, play your animation by clicking the play button.
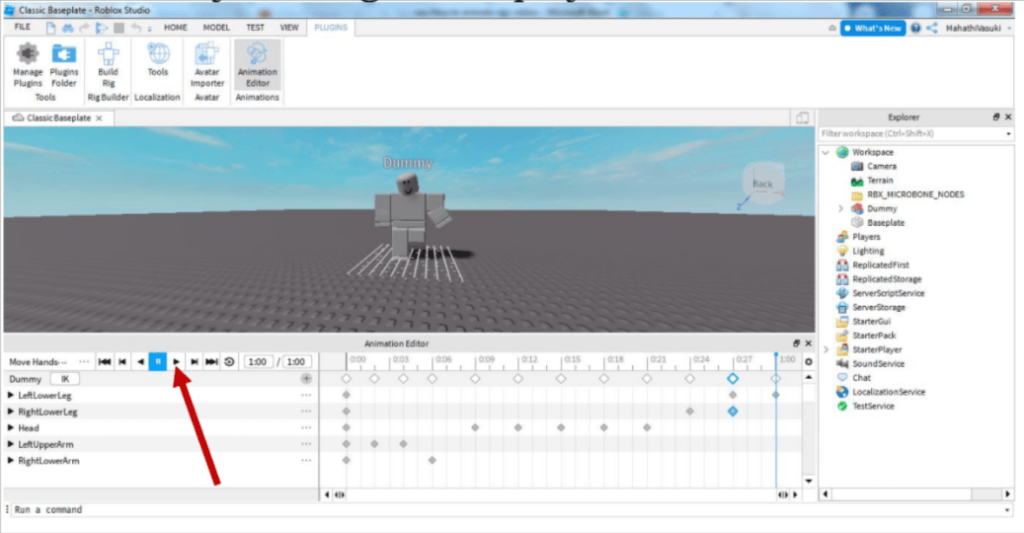
Step 12: You can add as many rigs as you want and perform the animation as described in Step 10.
Conclusion
That’s all! This is the entire process of animating a Roblox NPC. You are free to use your imagination to make your NPCs more interesting and relevant to the theme of your game.
You do not need to be a professional to complete any of the above steps and create a game in Roblox. All you need is a desire to learn and a love for video games.

Learn to create fun games in Roblox at BrightChamps with its specially designed curriculum, which makes learning game development and coding simple for students in Grades 1-12.
BrightChamps also teaches a variety of other programs that assist children in developing a foundation in computer programming through activities, interactive lessons, and other means.

