
Creating projects in Scratch is an incredible experience that allows you to use a variety of tools and features to make your designing and coding worthwhile.
You may have come across the “Add an extension” feature while exploring Scratch. If not, don’t worry; we’ll go over Extensions in detail in this blog.
Table of contents
What are Scratch Extensions?
An extension is a category that you can add to your project to make it more advanced. It enables you to connect to information on the internet, use external hardware, and so on.
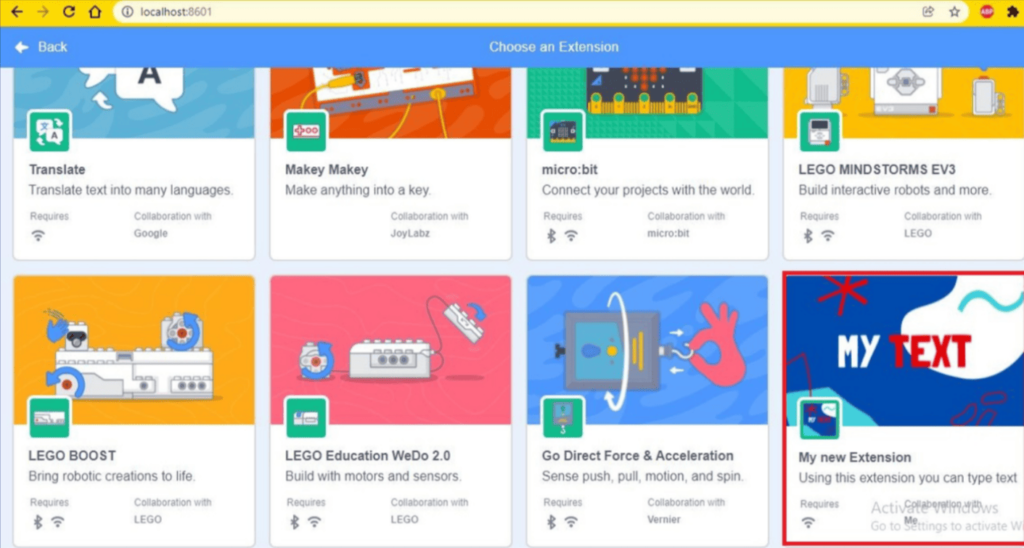
When you click on Add an extension icon in Scratch you will be directed to Choose an Extension section, where you can choose from available extensions.
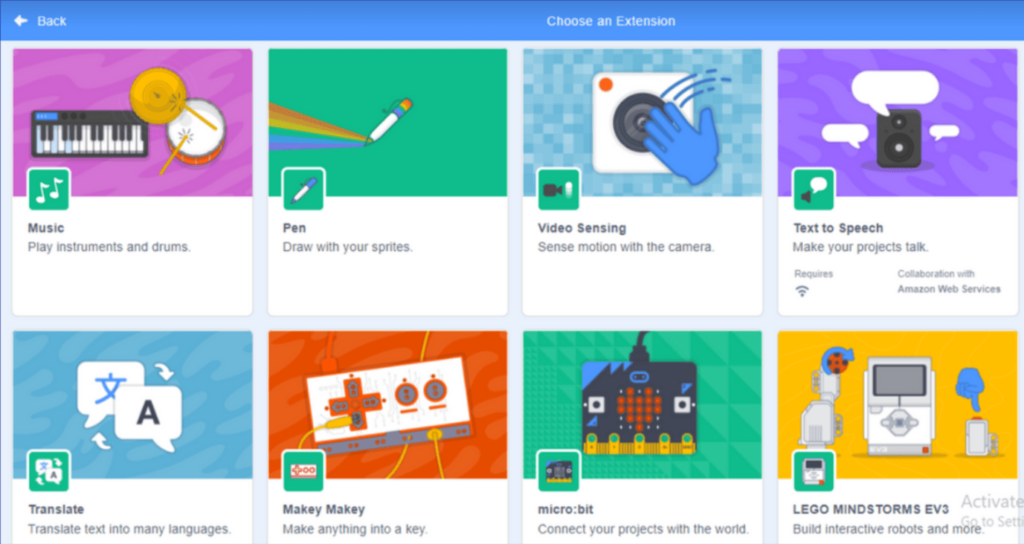
Different pre-built extensions are Music, Pen, Video Sensing, Text-to-Speech, Translate, Makey Makey, micro:bit, LEGO MINDSTORMS EV3, LEGO BOOST, LEGO Education WeDo 2.0, and Go Direct Force & Acceleration.
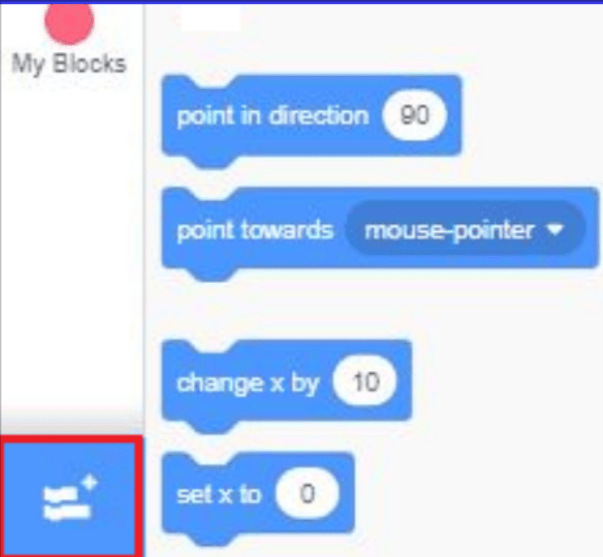
When you choose an extension, you will get the blocks related to that extension on Block Palette.
Image 3: Pen Extension
How to Create your own Extension in Scratch
If the feature you want isn’t available in pre-built extensions, you can make your own. Let’s take it a step further and look at how to create one.
Note: Extensions of Scratch are developed using JavaScript Environment.
Follow the steps below to create your own extension in Scratch.
Step 1: Setting up of Development Environment
(a) Installing Git and node.js
Download both from your favorite browser and then install.
Note: Node.js is an open-source, back-end JavaScript runtime environment. Git is required so that we can clone the scratch-gui and scratch-vm projects.
GUI stands for Graphical User Interface; VM stands for Virtual Machine.
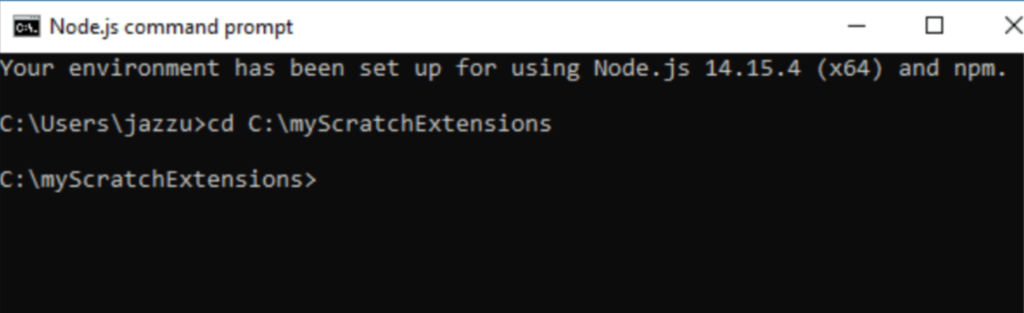
(b) Create a folder and name it descriptively (for example myScratchExtensions)
(c) Then open the Node.js command prompt. Go into the myScratchExtensions folder by copying its path in the command prompt (using cd).
Note: cd stands for change directory.
Once you are inside your folder, clone the GitHub repository scratch-gui by using the command and link:
git clone https://github.com/llk/scratch-gui
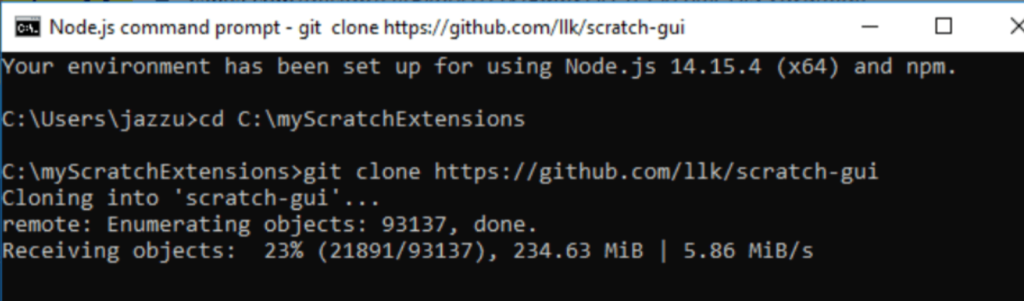
It will start cloning the scratch-gui project. After this process is completed, you will see a folder named scratch-gui inside your myScratchExtensions folder.
Similarly, we have to clone the project: scratch-vm using command and link:
git clone https://github.com/llk/scratch-vm

When this is completed, you will have another folder inside myScratchExtensions named scratch-vm.
Note: scratch-vm is a library that is responsible for running and maintaining the computer programs that are created using Scratch blocks. scratch-gui provides the interface for creating projects.
Now, go into these folders individually to install the packages using the npm install command.
(i) First go into the scratch-vm folder and type the command npm install.

(ii) Once installation is done, type another command npm link. This will link the two folders.

(iii) Repeat the above two steps for scratch-gui folder.


(iii) Next use the command: npm start and it will start the scratch service.
Remember: npm is Node Package Manager for JavaScript programming; it helps in installing various modules.
It is basically an online database consisting of packages, therefore, called as npm registry.
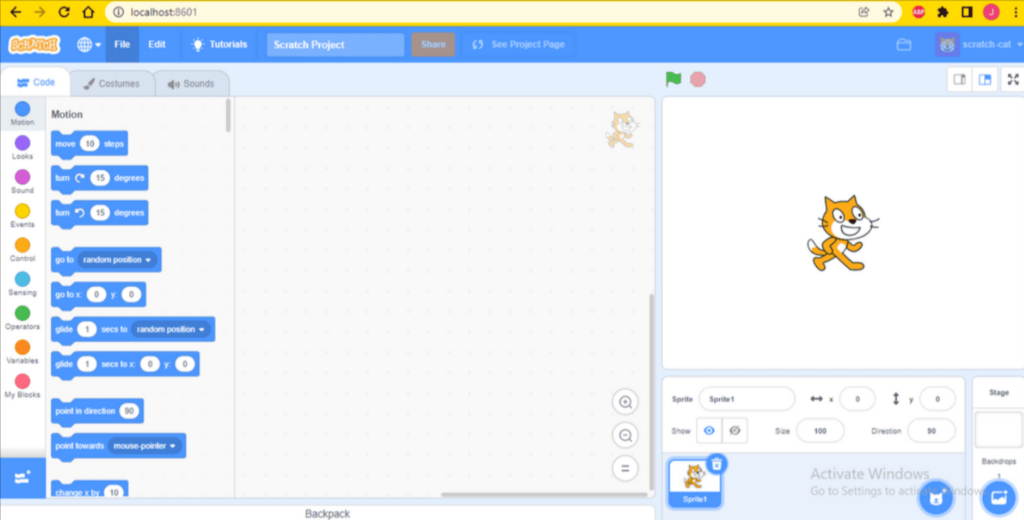
After compilation is completed, go to http://localhost:8601/ on your browser and see the magic!
Note: localhost means you are establishing a connection with your own computer. This link is not connected to the internet. So, you won’t be able to share or load your projects.
Step 2: Implementing and Creating your Extension
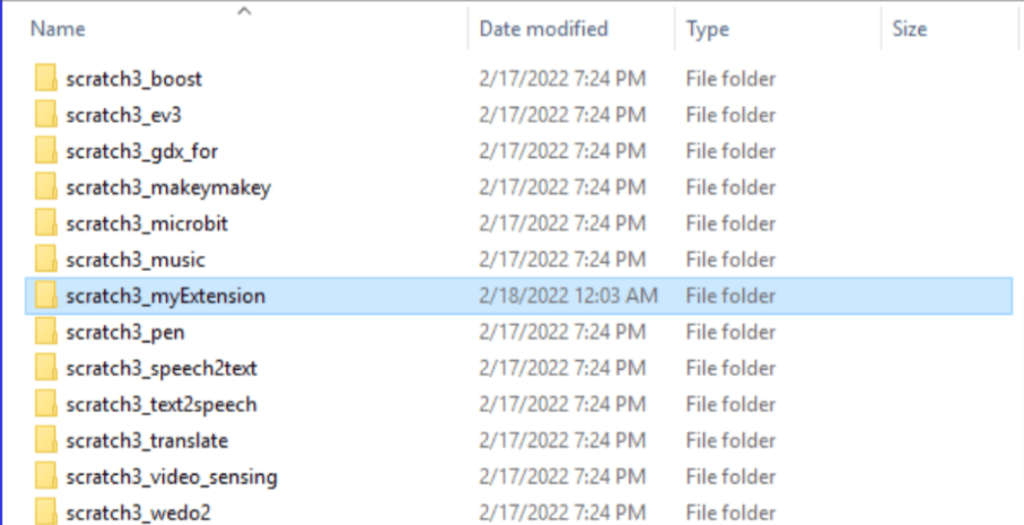
Go to: scratch-vm folder – src – extensions
In the extensions folder, create a folder for storing files related to your extension. I have named this folder as scratch3_myExtension.
Now, we will create a file named index.js. You can create this file using Brackets- a source code editor or any other JavaScript editor.
In this file, first, create a class, and then, code is to be written in order to register the extension.
Let’s create an Extension class in index.js:
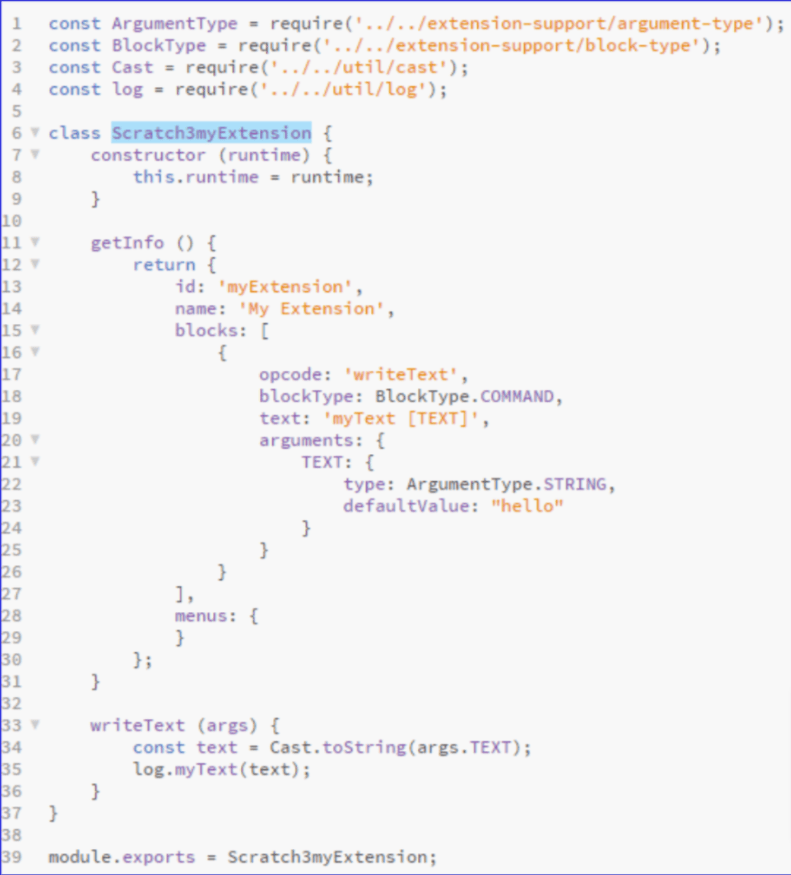
Here, we have created a class named Scratch2myExtension. getInfo() is a method that returns an object that is used for rendering the extension and blocks.
In getInfo method following terms are used:
- id: A unique internal name of Extension
- name: This will be displayed on the Scratch’s section of Choose an Extension.
- blocks: It contains the new objects/blocks of the new extension
- opcode: It is the method that is called to perform the operation of the block (here, writeText).
- blockType: Describes the block type. Here we have used.COMMAND.
- text: It contains the description of the block.
- arguments: It is an object that contains fields for different arguments. (Here, TEXT is an argument containing fields type and default value)
- menus(optional): It is used to create a drop-down menu for blocks.
next go to: scratch-vm folder – src – extension support – extension-manager.js
In extension-manager.js, add your extension’s path.

Working on the GUI
Create a background image and icon that you would like to display for your extension.
Then go to: scratch-gui folder – src – lib – libraries – extensions
Store your images in this folder. Also, here you will find a file named index.js; open this file. Type these commands in that file to import your images:

In addition to this, add the following code at the end of this file.
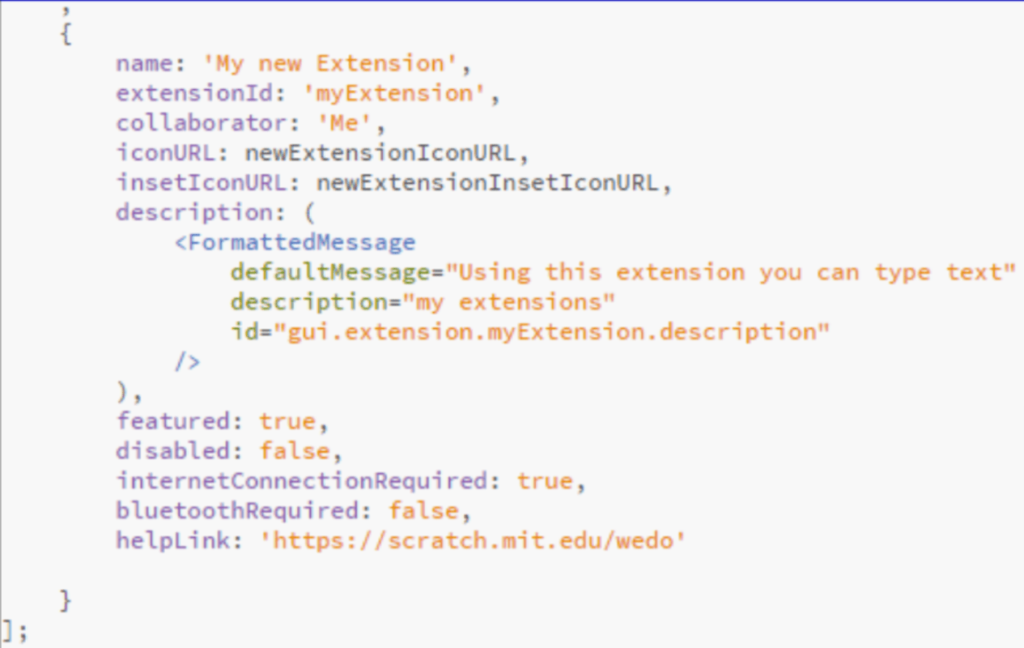
Name is the name of your extension in this sample code, and defaultMessage is the message that will be displayed on the menu, so you can be creative with it.
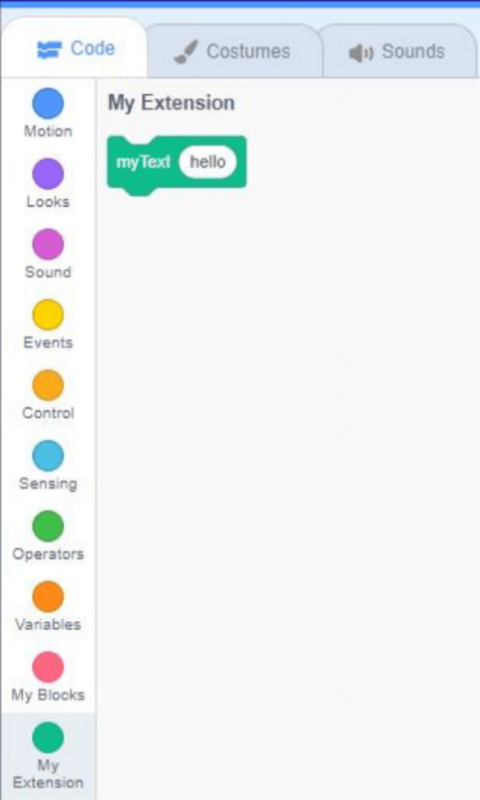
When you click on your Extension, you will see your block on Block Palette as shown below.
Conclusion
Cheers! You’ve just learned how to create your own extensions in Scratch using JavaScript programming. I’m interested to see how you use this knowledge to create your mind-boggling extensions.
Happy Brainstorming and creating!
Learn Scratch at BrightChamps with its specially designed curriculum that makes learning programming easy for students in Grade 1-12.
BrightChamps also teaches a variety of other programs that help kids build a foundation in computer programming through activities, interactive lessons, and other means.


![Ultimate List of 30 Best Scratch Games for Kids [2022 Edition]](https://pages.brightchamps.com/blog/wp-content/uploads/2022/09/Ultimate-List-of-Scratch-Games-for-kids-400x250.jpg)