Coding has become easier for most people, including children, since the introduction of Scratch to the programming world.
It has made it easy for people to understand the fundamentals of coding. You can use this software to create a variety of games, animations, and even applications.
Scratch is a coding platform as well as a programming language that is block-based, which means you can create any type of project by stacking these code-embedded blocks.
There are no limitations to the types of projects you can create in Scratch.
In addition, there are a plethora of elements to choose from in scratch, but what’s even more fun is that you can create your own. This blog discusses how to create a snowflakes effect, which can be extremely useful in one of your projects.
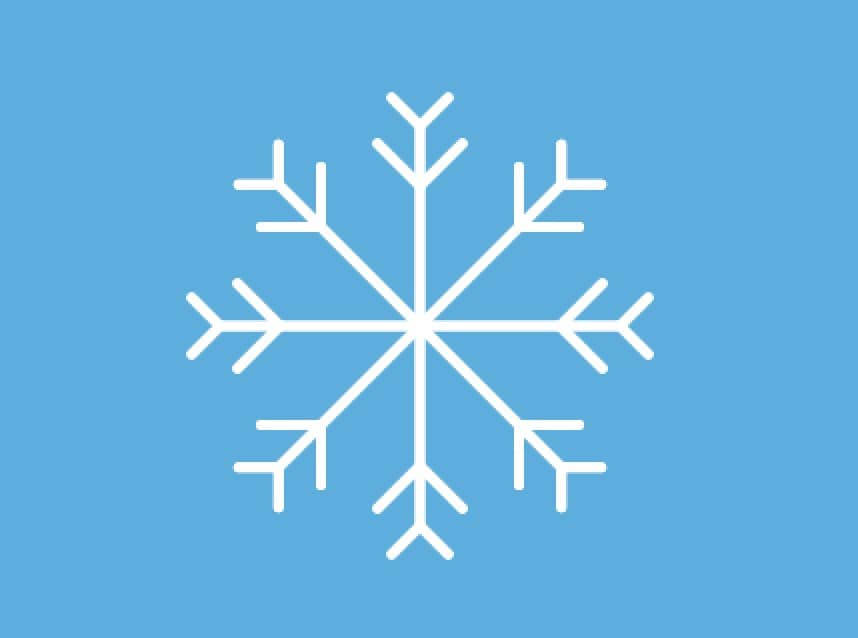
We will be learning about how to make a snowflake effect using the pen extension.
Create a snowflake effect using pen extension in Scratch
To begin, open Scratch in your web browser or you can even download scratch to your computer to work on your project offline.
Let’s get started.
Adding Pen extension in Scratch
To begin, go to the bottom left corner of your screen and click on a button, this is an Extensions button.
You’ll now be in the Extensions library, where you’ll find a plethora of options. From there, select the Pen extension.
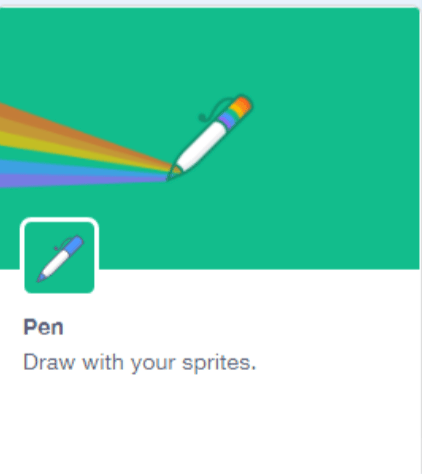
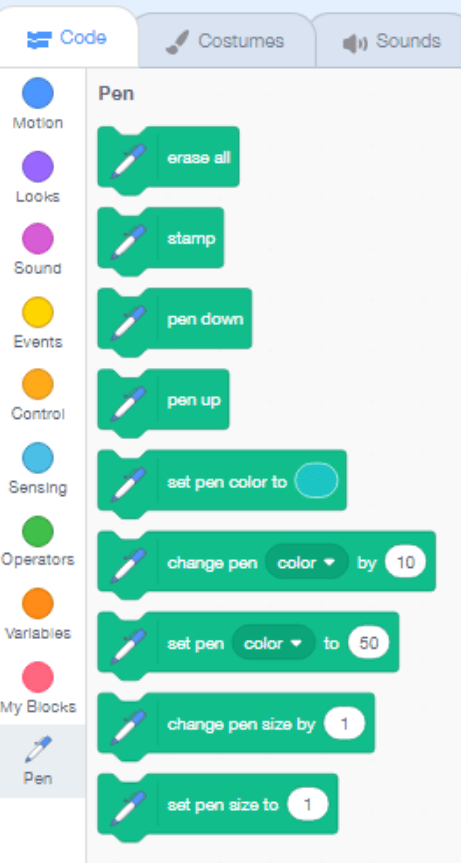
Following that, your pen category will look like the one shown in the picture. If you complete this step successfully, you can move on to the next.
Make the Variables
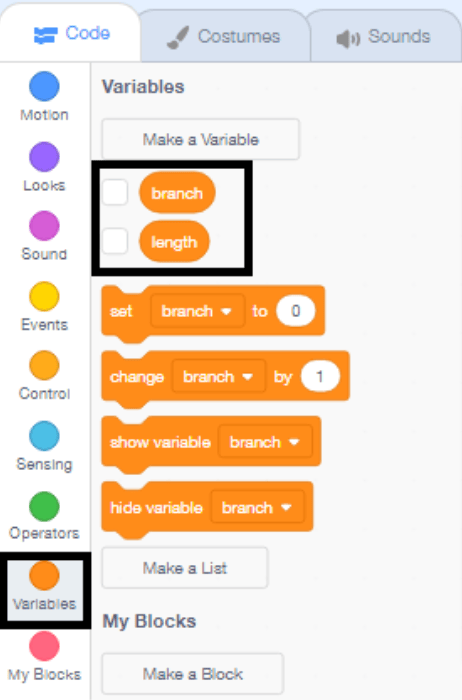
You must first create some variables before you can begin coding. On the left side of our screen, select the variable category. Then, on the Variables tab, click on the Make Variable button to add two variables.
The first element you select is a branch, which you will use to create a branch in each of your snowflakes’ lines. The second parameter to select is length, which specifies the length of the line.
Code for preparing the project
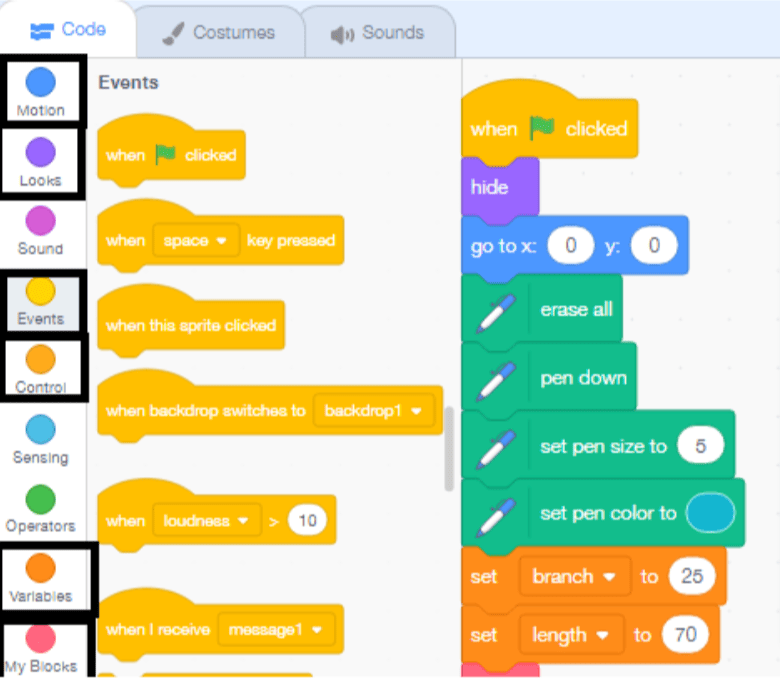
To begin, you will use a cat Sprite for your project. Then you’ll need an initiation block from the Events category, similar to the one shown in the picture below.
Then, drag the block to the Script area in the center of your screen. Then you’ll need another block from Looks called ‘hide.’ Then, in the motion category, select x…y and change the number to “0.”
Then, return to the pen extension you previously added. Set pen size to “5”, and set pen color to light blue or white.
Next, in the variable category, set the branch block to 25 and add another set block, in which you must choose the name of the variable to length and set the value to 70.
Making a function to draw one layer of snowflake
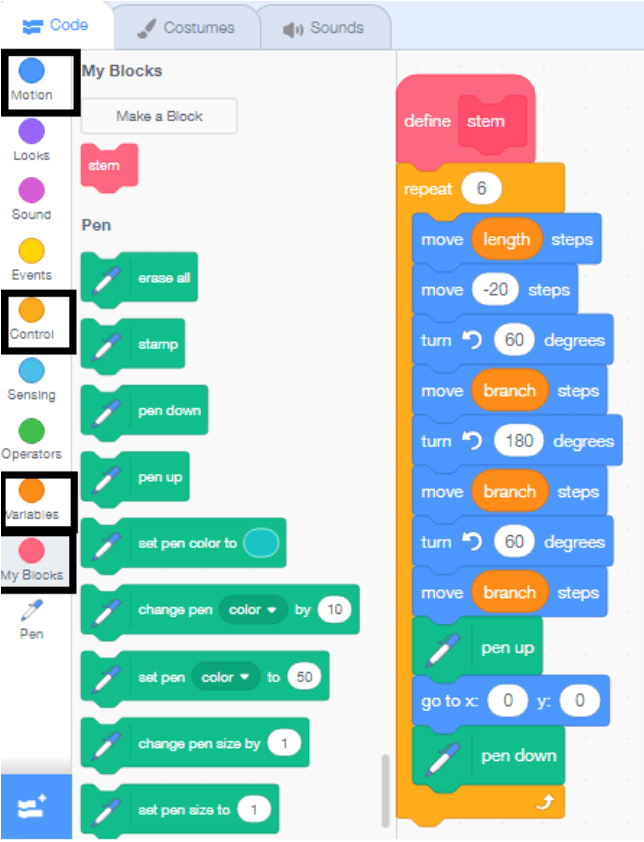
First, you must create My Block in order to customize the function that you will need to create, “stem.” Following the stem block, select a repeat block from the control category. Change the number of repeats to six, and then click on the motion block to draw the snowflake pattern.
Draw a one-layer snowflake using this function block.
Repeat the function for the bigger snowflake
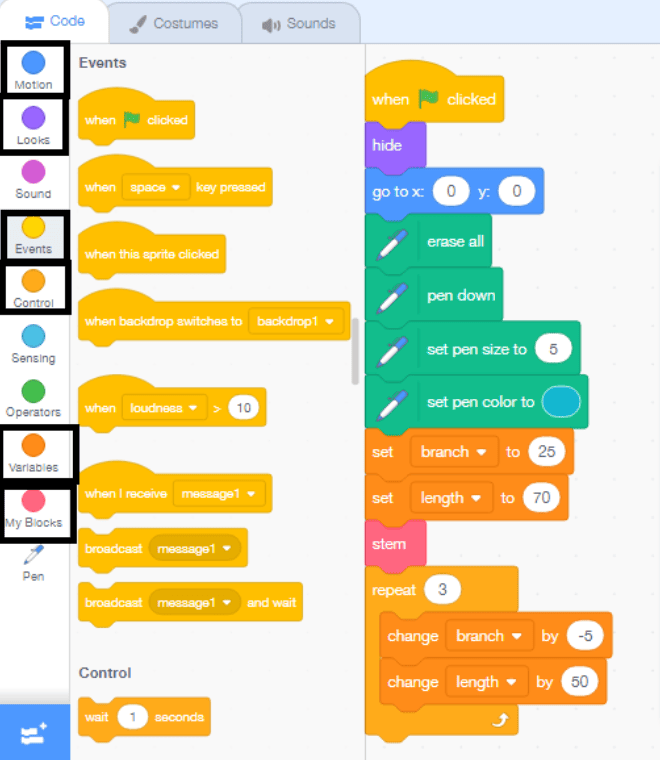
After successfully creating one snowflake layer, now create a three-layered snowflake. To accomplish this, you will repeat the layer three times to create a larger snowflake. All you need to do is add this block to your previous one.
That’s it! This is how you create a snowflake effect using Pen extension in Scratch.
Conclusion
Scratch is a platform that allows any coder to explore their creativity while learning to code. There are many elements to choose from in scratch, but you can also create your own for a more personalized and enjoyable experience. So, what are you waiting for? Start making your own games and apps and work your way up to become a programming expert.

Learn Scratch at BrightChamps with its specially designed curriculum that makes learning programming easy for students in Grade 1-12. BrightChamps also teaches a variety of other programs that help kids build a foundation in computer programming through activities, assignments, and other means.



![Ultimate List of 30 Best Scratch Games for Kids [2022 Edition]](https://pages.brightchamps.com/blog/wp-content/uploads/2022/09/Ultimate-List-of-Scratch-Games-for-kids-400x250.jpg)
