After over more than a decade of its release Scratch has established itself as one of the best platforms to go to learn to code, especially for kids.
It is the world’s largest community of creative coders, with over 43 million registered members.
It is well-known for its user-friendly interface as well as the fact that it is a block-based programming language where codes are already available in blocks.

Scratch features a tonne of blocks along with several tools and features that help these blocks in a variety of ways. Backpack in Scratch is one such feature.
What is Backpack in Scratch?
The concept of Backpack in Scratch is quite simple. For example, when you go to school, you load your bag with the books you have at home and bring it with you to school, correct?
This is because you will require the same book at both locations. Scratch’s Backpack has the same function.
It lets users migrate scripts, costumes, and sounds between projects by copying and pasting them.
The Backpack option is present at the bottom of the scratch editor.
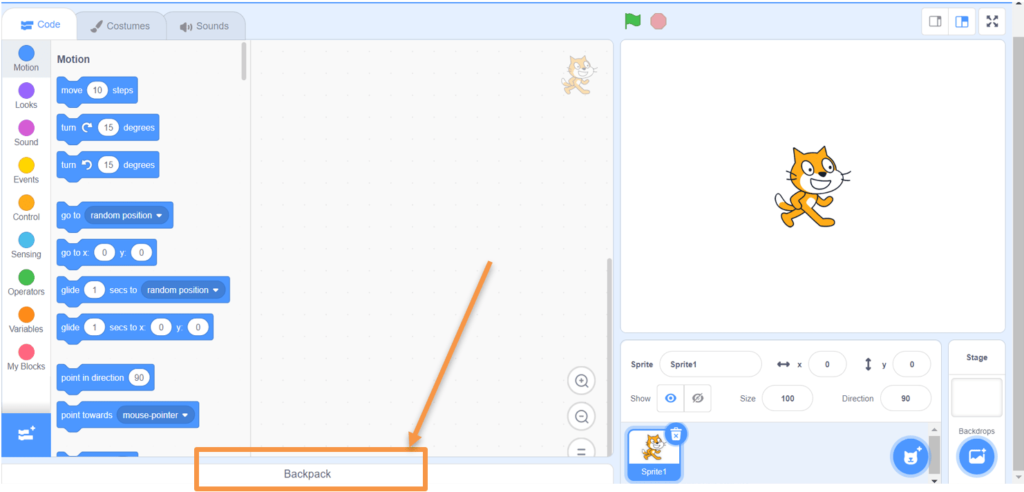
Few points about the Backpack that one must keep in mind:
- First of all, one can only access one’s own Backpack, and to prove your identity you must be logged in. If you try to access somebody else’s Backpack, you will see an error.
- When a media is dragged from the Backpack, the object is not removed from the Backpack but is just duplicated.
- If an item’s icon has a question mark on it, it means that the item has failed to be fully put in the Backpack and it does nothing when dragged to the project.
- The Backpack is collapsible; hence it won’t take up extra space if you are not using it.
- The Backpack is only available for the online editor. If you are programming in the Offline Editor, you must first export the material in the project to use in another project or online.
- The Backpack shows an icon or image of the media in it, and some other information about it, for example:
- If it is a sprite then it shows the thumbnail of the sprite, as it was dragged into the Backpack, along with the name of the sprite.
- If it is a costume, it shows a thumbnail of the costume, along with the name.
- If it is a sound, it shows a sound icon, along with the sound’s name.
- If it is a Script, it shows a thumbnail of the script, and the text “Script”.
Now, let us learn how do we put items into our Backpack
How to put items in Backpack in Scratch
Well, it’s simply a three-step process.
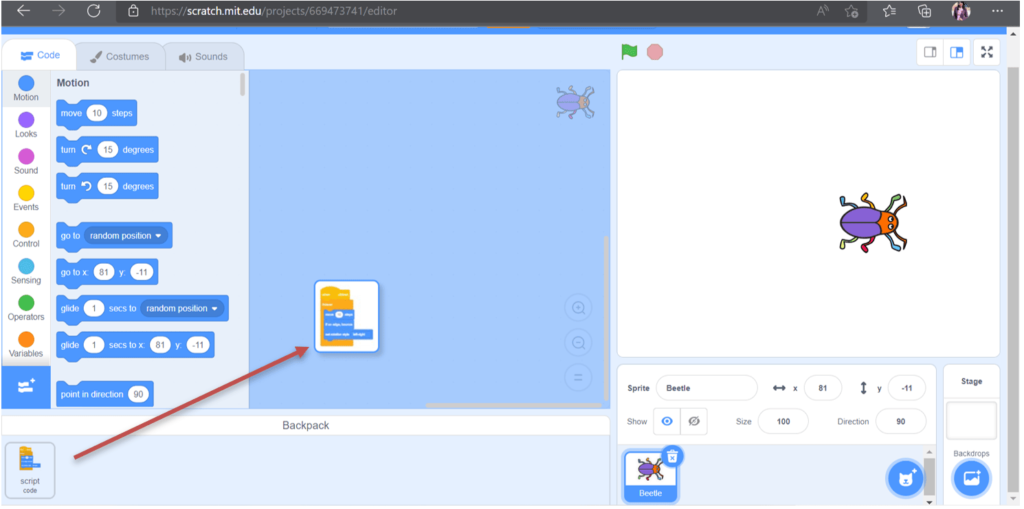
Step 1: Click on the Backpack option to open it.
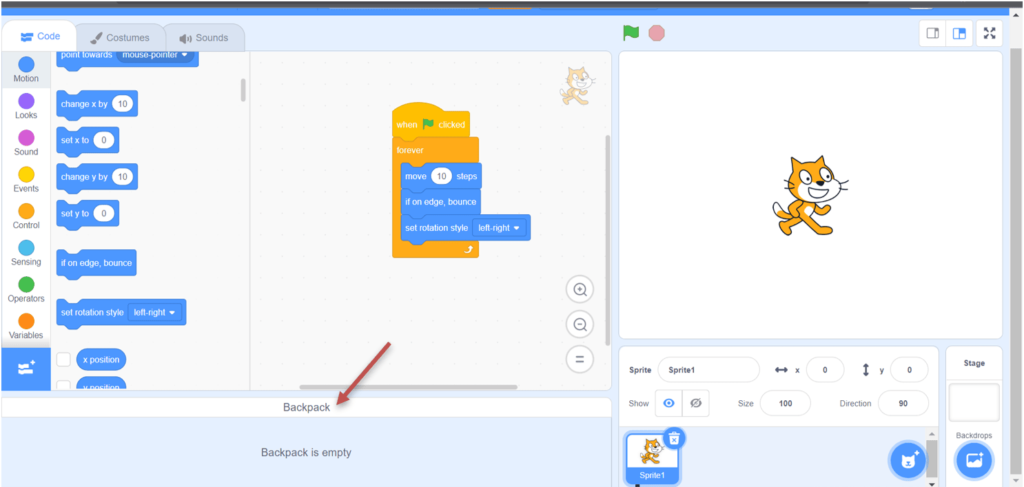
Step 2: Drag whatever (i.e., scripts, costumes, and sounds) you want, inside the Backpack and leave when the Backpack becomes blue.
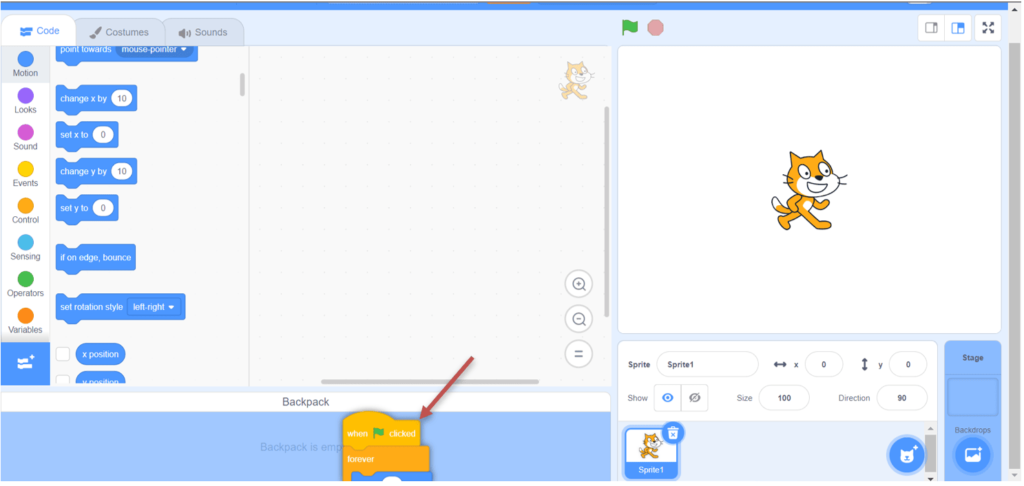
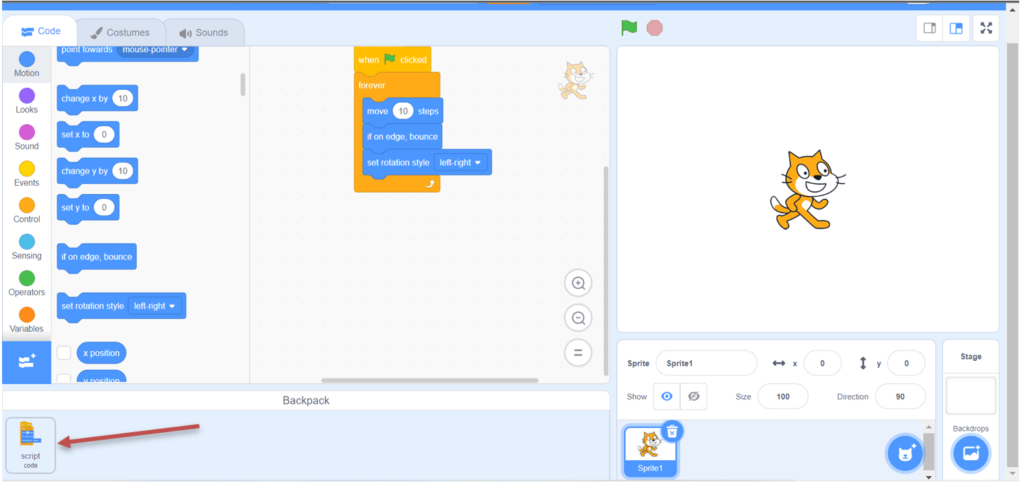
Step 3: Now go to the project where you want these copied components (present in your Backpack) and drag them out from the Backpack to place the components accordingly wherever you need them.
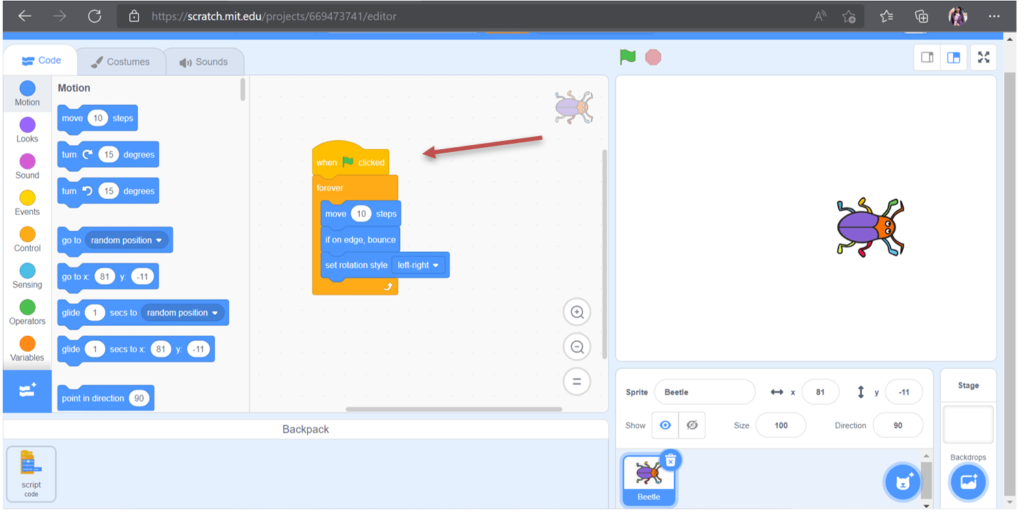
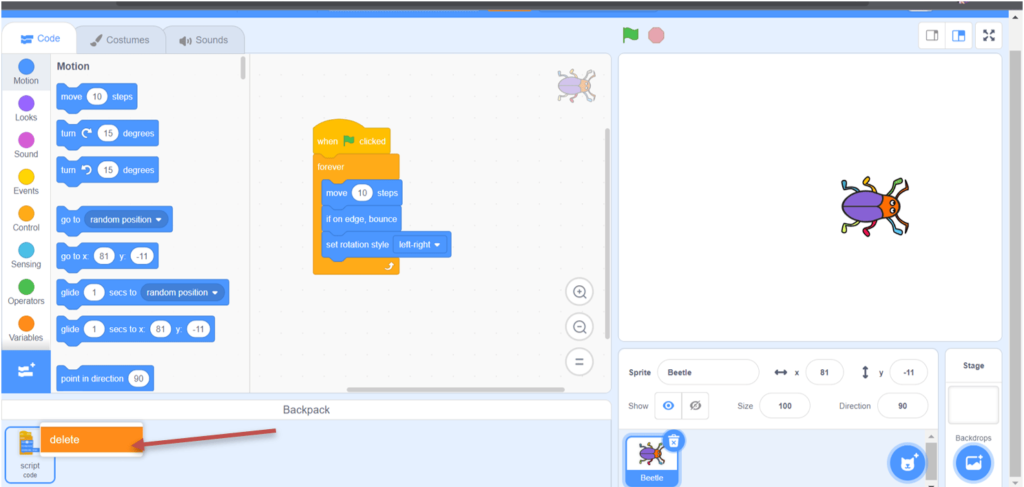
Lastly, if you want to delete an item from inside the Backpack, just right-click on it to get the delete option.
Conclusion
Backpacks are a really useful option in Scratch. It saves you plenty of time by not having to do the same coding over and over again.
A backpack is a section where you can save and reuse an algorithm or logic for the same or a different project. It can be anything from a sprite, a movement, sounds, etc.
Make sure to try and use the concept of Backpack in Scratch the next time your work on a project.
Learn Scratch at BrightChamps with its specially designed curriculum that makes learning programming easy for students in Grade 1-12.
BrightChamps also teaches a variety of other programs that help kids build a foundation in computer programming through activities, interactive lessons, and other means.


![Ultimate List of 30 Best Scratch Games for Kids [2022 Edition]](https://pages.brightchamps.com/blog/wp-content/uploads/2022/09/Ultimate-List-of-Scratch-Games-for-kids-400x250.jpg)


